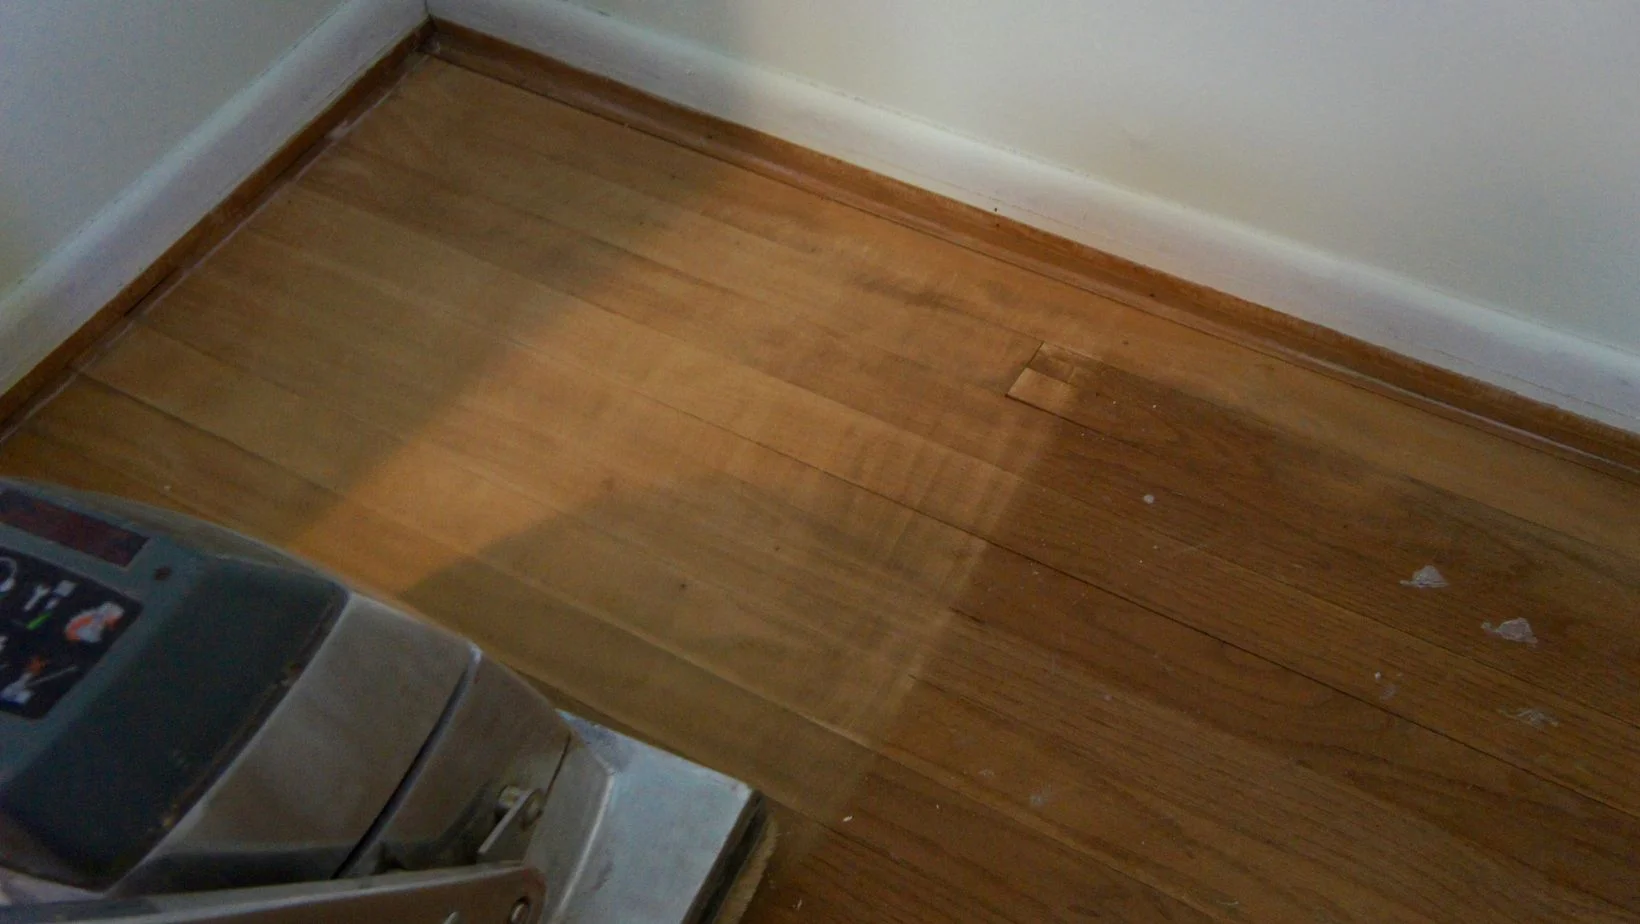
Achieving flawless and beautifully polished hardwood floors requires the right tools and techniques. Among these, the floor sander stands out as a powerful ally. Whether you’re a seasoned DIY enthusiast or a professional contractor, understanding how to use a floor sander correctly is essential for getting remarkable results. In this comprehensive guide, we will walk you through the process of using floor sanders effectively, covering different types like the orbit floor sander, drum floor sander, and random orbit sander. So, let’s dive in and unlock the secrets to pristine hardwood floors!

Section 1: Preparing for the Task
Before diving into sanding, thorough preparation is vital to ensure a smooth and successful process.
- Inspect and Clean the Floor: Start by inspecting the hardwood floor for any protruding nails, staples, or damages. Carefully remove any debris, dust, or loose materials that may interfere with the sanding process.
- Gather Essential Safety Gear: Prioritize your safety by wearing protective gear, including safety goggles, a dust mask, and ear protection. Floor sanders can be noisy and generate dust, making proper protection crucial.
- Choose the Right Floor Sander: Selecting the appropriate floor sander for your specific project is paramount. The three main types are the drum floor sander, orbit floor sander, and random orbit sander.

Section 2: Mastering Drum Floor Sanders
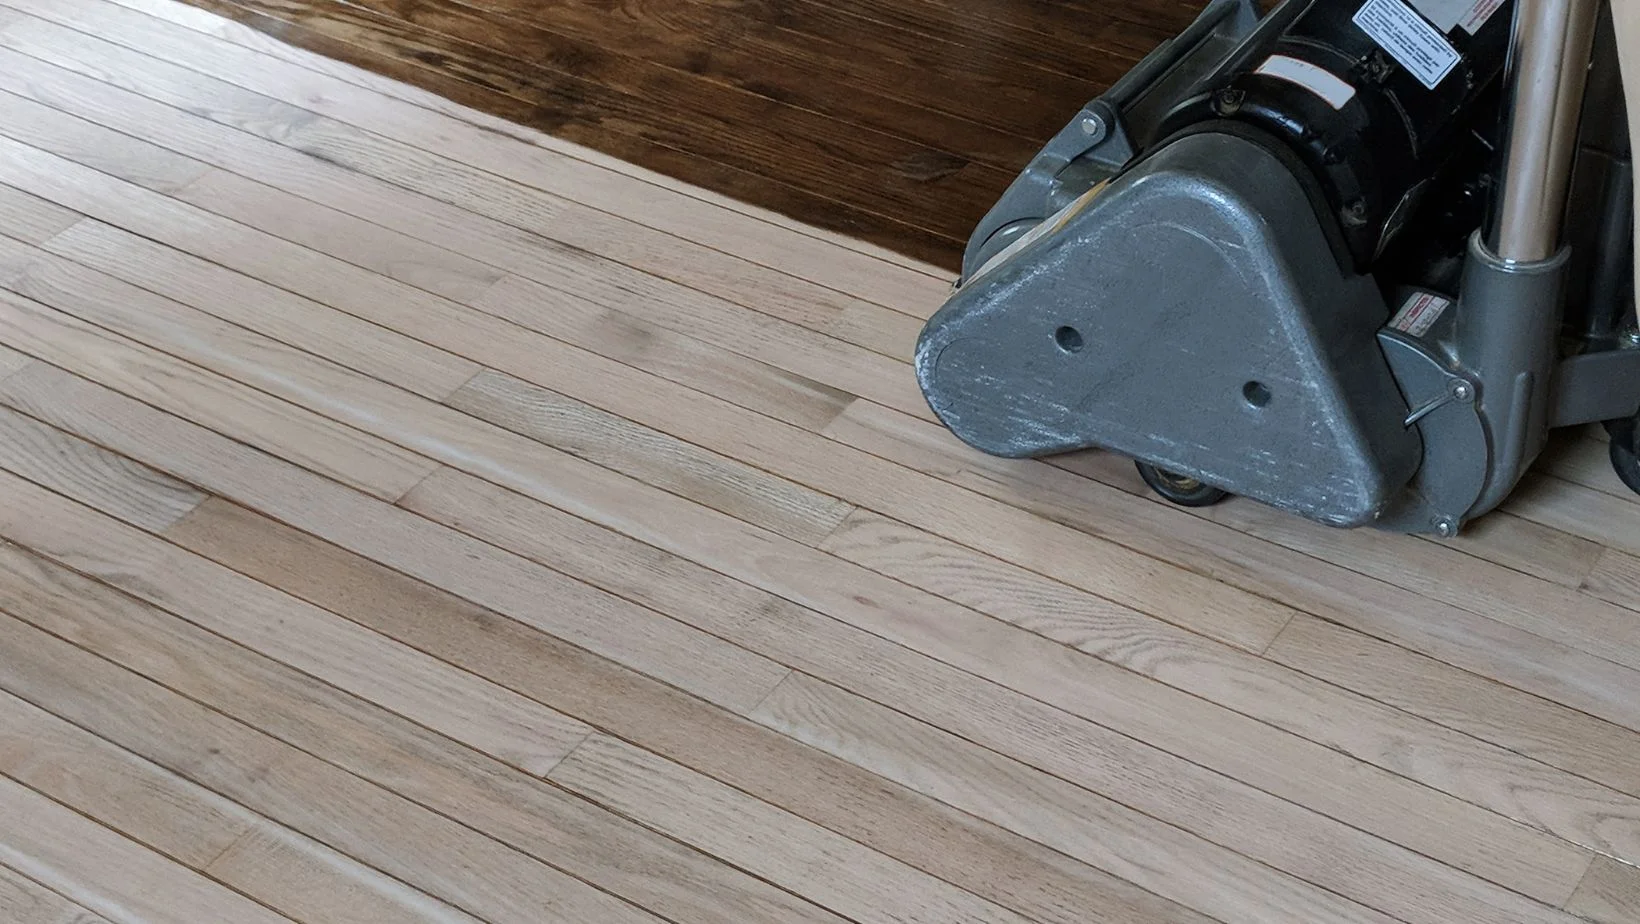
- Understanding Drum Sanders: Drum floor sanders are powerful and ideal for heavy-duty sanding tasks. Their large cylindrical sanding drum rotates making them highly effective for stripping and leveling hardwood floors. Its aggressive sanding action can remove stubborn finishes and imperfections in no time.
- Tips for Using Drum Sanders:
- Start in an open area: Practice operating the drum sander in a clear space before moving to the main floor.
- Maintain a steady pace: Keep the drum sander moving in a smooth, consistent manner to avoid uneven results.
- Overlap each pass: Slightly overlap each pass to prevent leaving sanding marks on the floor.
- Dealing with Imperfections: Drum sanders can be aggressive, so it’s essential to handle them with care. If you encounter deep scratches or stubborn stains, try progressively finer sandpaper grits until the imperfections are less visible. Remember to keep the sander moving to avoid creating low spot
Section 3: Embracing Orbit Floor Sanders
- Introducing Orbit Floor Sanders: Also known as pad sanders, these are versatile tools that excel at fine finishing. They use a circular sanding pad that moves in a random orbital pattern, reducing the risk of swirl marks. They are an excellent choice for the final sanding stages.
- Tips for Using Orbit Sanders:
- Use fine-grit sandpaper: Orbit sanders are best suited for the final sanding stages, so opt for higher grit sandpapers.
- Apply even pressure: Avoid pressing down too hard to prevent sanding irregularities.
- Change sandpaper as needed: Replace worn-out sandpaper to maintain optimal performance.
- Achieving Smooth Transitions: When switching from the drum sander to the orbit sander, ensure a seamless transition by feathering the sanding edges. This prevents noticeable lines and creates a uniform appearance.
Section 4: Excelling with Random Orbit Sanders
- Unveiling Random Orbit Sander: Combining the best of both worlds, this versatile sander offers the power of a drum sander and the swirl-free sanding of an orbit sander. Its dual-action makes it suitable for various sanding tasks, making it a favorite among both professionals and DIYers.
- Tips for Using Random Orbit Sanders:
- Work in small sections: Random orbit sanders are efficient, but work in smaller areas at a time to achieve a flawless finish.
- Choose the right grit: Start with coarser grits for heavier sanding and gradually switch to finer ones for a smoother surface.
- Fine-Tuning for Perfection: Random orbit sanders can provide an exceptional finish, but to achieve absolute perfection, hand sanding may be necessary in corners and tight spaces. Employ a light touch to preserve the sander’s overall smoothness. Remember to keep the sander moving to avoid creating low spot
In conclusion, mastering the art of using floor sanders is essential for achieving stunning hardwood floors. By following the tips and techniques mentioned in this guide, you can confidently handle drum floor sanders, orbit floor sanders, and random orbit sanders with ease. Remember to prioritize safety, select the right sander for your project, and be patient throughout the process. With practice, you’ll be able to transform your hardwood floors into a timeless masterpiece. Happy sanding!