
Hardwood floors provide both value and beauty to a home and are highly cherished by homeowners across the globe. However, smoke stains can quickly destroy their beauty. Fortunately, cigarette burns on hardwood floors can be removed in a short amount of time with the assistance of this comprehensive manual.
The Problem of Cigarette Burns on Hardwood Floors
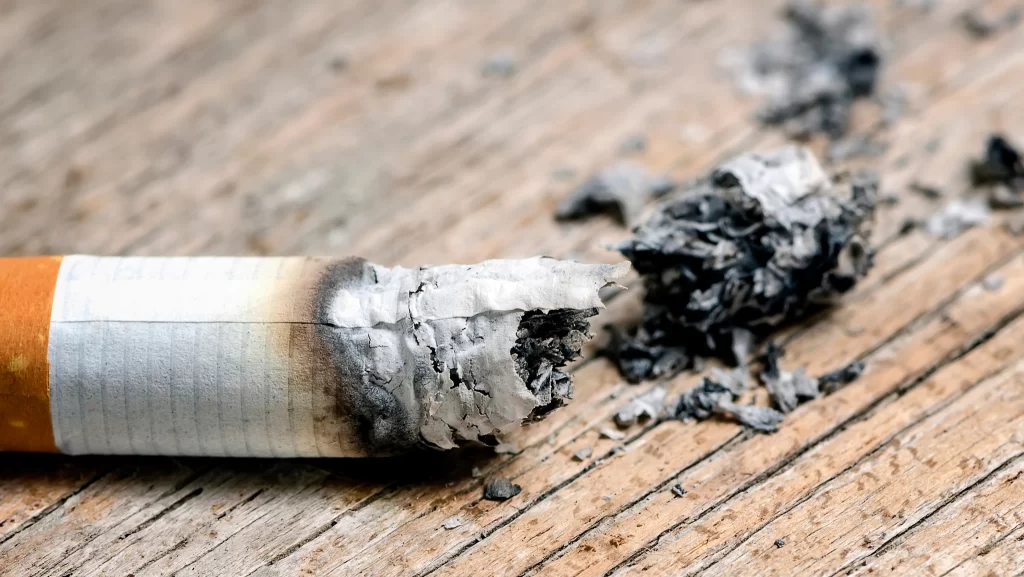
On hardwood flooring, cigarette burns can cause damage ranging from barely noticeable traces to profound gouges. It is possible that the most effective solution to the problem will differ depending on the nature and extent of the injury. In order to select the most effective restoration strategy, it is necessary to comprehensively understand the extent of the damage.
Step 1: Assessing the Burn
Before repairing cigarette burns on wood flooring, the extent of the damage must be assessed. A significant burn can affect the wood’s grain, while a minor one may only damage the floor’s surface. Examine the charred wood carefully, as superficial burns can form even when the wood beneath appears undamaged.
The best treatment for burns depends on their severity. Smaller burns can be repaired by sanding and refinishing, while larger burns can be treated with wood infill or new floorboards. Utilize a toothpick to determine the degree of the burn.
Step 2: Prepping the Area
After determining the extent of the damage, acquire the required supplies to repair it. For treating cigarette burns, you will require steel wool, sandpaper, a clean cloth, wood filler (for severe burns), and tung oil.
Before focusing on the burn mark, thoroughly clean the area. This way, you won’t grind any grime or debris into the wood when fixing it.
Use a clean towel, mild detergent, and water to wipe the affected area. Afterwards, thoroughly dry everything with a towel before continuing.
Step 3: Removing the Burn Mark
Steel wool can be used to eradicate superficial burns from hardwood floors. First, the burn mark in the timber grain should be lightly rubbed with steel wool. This method is safe for the wood and can be used to sanitize the burned surface.
Keep the wood’s grain intact while removing a burn trace. Scrubbing the repaired area against the grain may damage the hardwood and accentuate the patch.
Monitor the progress of your work frequently. To protect the wood, you should cease scrubbing once the burn trace has vanished.
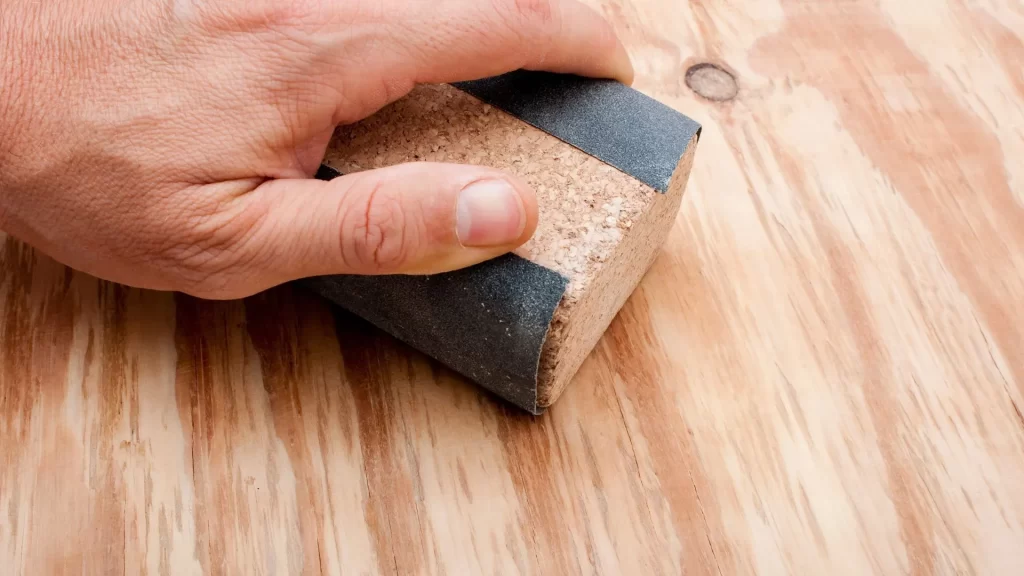
Step 4: Dealing with Deep Burns
The burned wood is sanded to remove any scorched grot. Use coarse sandpaper to remove the majority of the damage, and then use your fingertips to smooth the surface.
To prevent damaging the floor, utilize a sanding block or electric sander with a pointed edge. Remember to always sand in the direction of the wood grain.
If the burn is too deep to be removed with sandpaper, use wood filler or putty. Once the filler has dried, sand it to the same level as the floor and apply a sealant.
Step 5: Restoration and Finishing
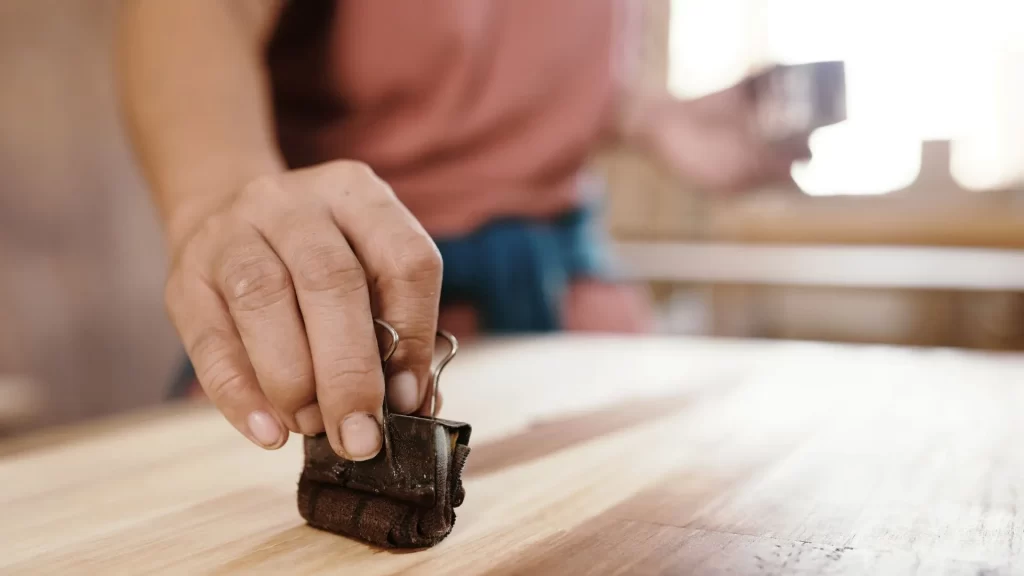
The floor can be refinished once the burn is removed. You may use tung oil to enhance the appearance of the wood and protect it from moisture.
Along the wood’s grain, a clear, lint-free cloth should be used to rub tung oil into the wood. After 15 minutes of soaking, remove excess oil with a dry towel. Between oil coats on your floor, you should delay an appropriate amount of time.
Tung oil is one method of many for protecting hardwood surfaces. There are also abrasion-resistant matte and lustrous polyurethane coatings available. Wax coatings may be more challenging to use, but the final result is an attractive, natural gloss. The optimal option will depend on your personal preferences and flooring requirements.
In conclusion, fixing hardwood floors ruined by cigarette burns is very possible with the proper tools, techniques, and time. Restoration and finishing are just as important as the first steps of inspection and preparation. After carefully removing the burn mark and treating any deep burns, allow time for a thorough restoration and finish. Always remember that a thorough evaluation, meticulous preparation, and an emphasis on preserving the gloss and grain of the wood are the keys to a successful repair.